
LEGO Christmas Tree Ornament
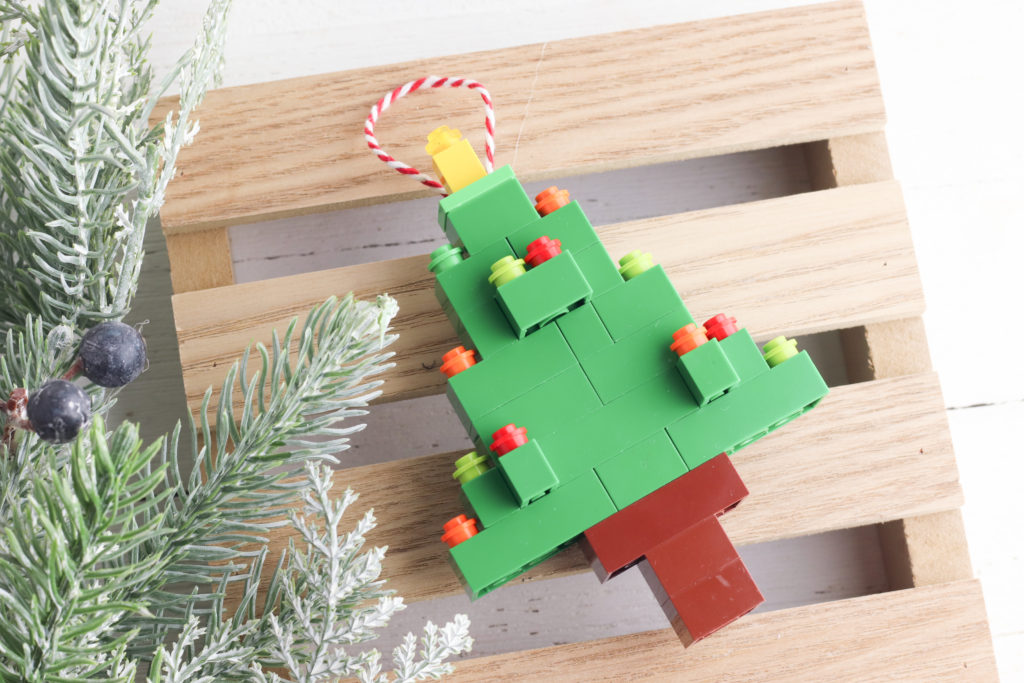
Surprise and delight the biggest LEGO fan with this LEGO Christmas Tree ornament! This tutorial shows you how to use LEGOs that you may already have to create the cutest Christmas tree!
How to Make a LEGO Christmas Tree

The first step is to gather bricks in a variety of sizing and colors. Here is the quick run down on what LEGO bricks you are going to need:
- 2 2X2 brown bricks
- 1 2X4 brown brick
- 5 2X2 green bricks
- 3 2×3 green bricks
- 4 2×4 green bricks
- 5 1×2 green bricks
- 2 1×4 green bricks
- 1 1×1 yellow brick
- 1 2×2 green jumper plate
- 13 round 1×1 plates, various colors
- String
- Glue

Once you have your bricks ready, make the Christmas tree “trunk” by stacking 2 2×2 blocks with one 2×4 block on top.

Add one 2×2 brick to the center of the trunk and two 2×4 bricks on each side.

Place one 2×4 brick in the center of the stick. Add one 1×4 brick on each end lengthwise. Finish the row with one 1×2 brick on each end.

Place two 2×3 bricks on the next row.

Make the next row with one 2×3 brick, one 1×2 brick, and one 2×2 brick.

Add one 2×4 brick lengthwise in the center of the next row and one 1×2 brick on each side of the larger brick.

The next row is two 2×2 bricks. Top with one 2×2 brick, one green jumper plate, one 1×1 yellow brick, and one 1×1 yellow round plate.

Decorate each end of the bricks with the remaining 1×1 plates.

Create a loop with a piece of string and glue it to the back of the Christmas tree to hang.

Get creative with LEGO bricks and make your very own LEGO Christmas Tree ornament.LEGO Christmas Tree Ornament

Materials
Tools
Instructions

Handmade Ornaments
If you love handmade ornaments, be sure to visit my shop for unique personalized Christmas ornaments. You might also want to DIY Christmas ornaments like these DIY Wood Ornaments: Christmas Wreath Ornaments or try making an ornament from your favorite movie like a DIY Harry Potter Hedwig Christmas Ornament or DIY Dory Christmas Ornament.

Love Christmas ornament DIYs? Pin this craft and make it together with your family!
