
How to Whitewash a Brick Fireplace
With any project, it is best to take great photos before starting so you can compare. I was so eager to jump into remodeling our living room that I forgot! But I did take photos of the process once I got started. I read so many tutorials online and suggestions I found on Pinterest on how to whitewash a brick fireplace that I wanted to share my own tips and completed project.
How to Whitewash a Brick Fireplace Gray
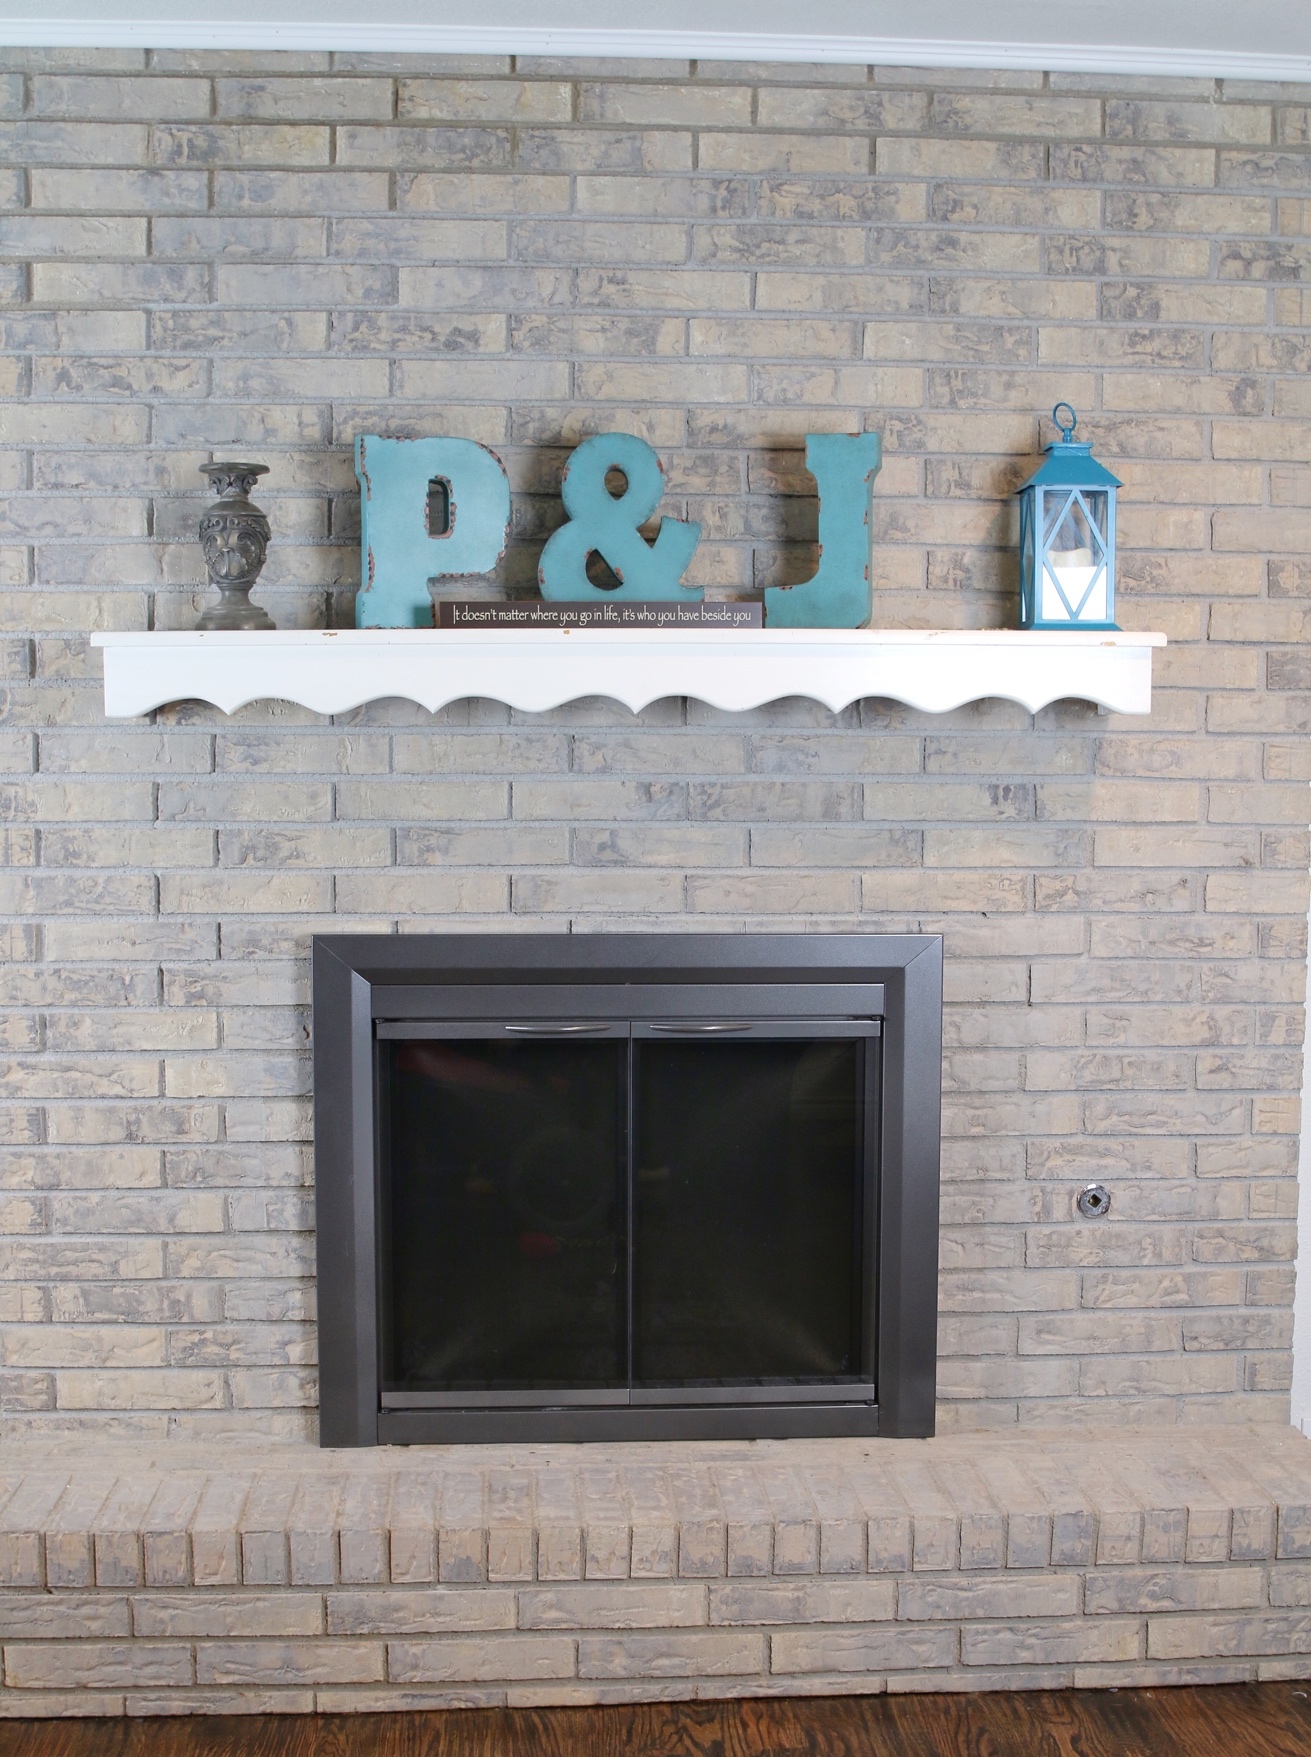
First, I am calling it whitewash since it is the same technique but I did not use a white based paint. I went with a gray color, slightly on the darker side since I knew I was going to water it down. We are currently working to remodel our entire home but have started with the kitchen, dining room, and living room. While we were remodeling the walls in the living room by taking down the old paneling and having it textured, we went with a new paint color which inspired me to also paint the bricks. Out with the cream and in with the gray!

Whitewash an Indoor Brick Fireplace for Under $10!
Our contractor suggested we use Sherwin-Williams. When you visit their store you can view all the paint options in color swatches and then purchase small jugs of samples to take home and paint on the walls until you decide on your favorite color. The jugs are not small in the least, they hold a pint of paint! That is more than enough to complete a small project so save all your samples.
I purchased a sample for about $7 of the Dorian Gray and used it on my bricks and still have almost half a pint left. To whitewash bricks you use one part paint and three parts water.
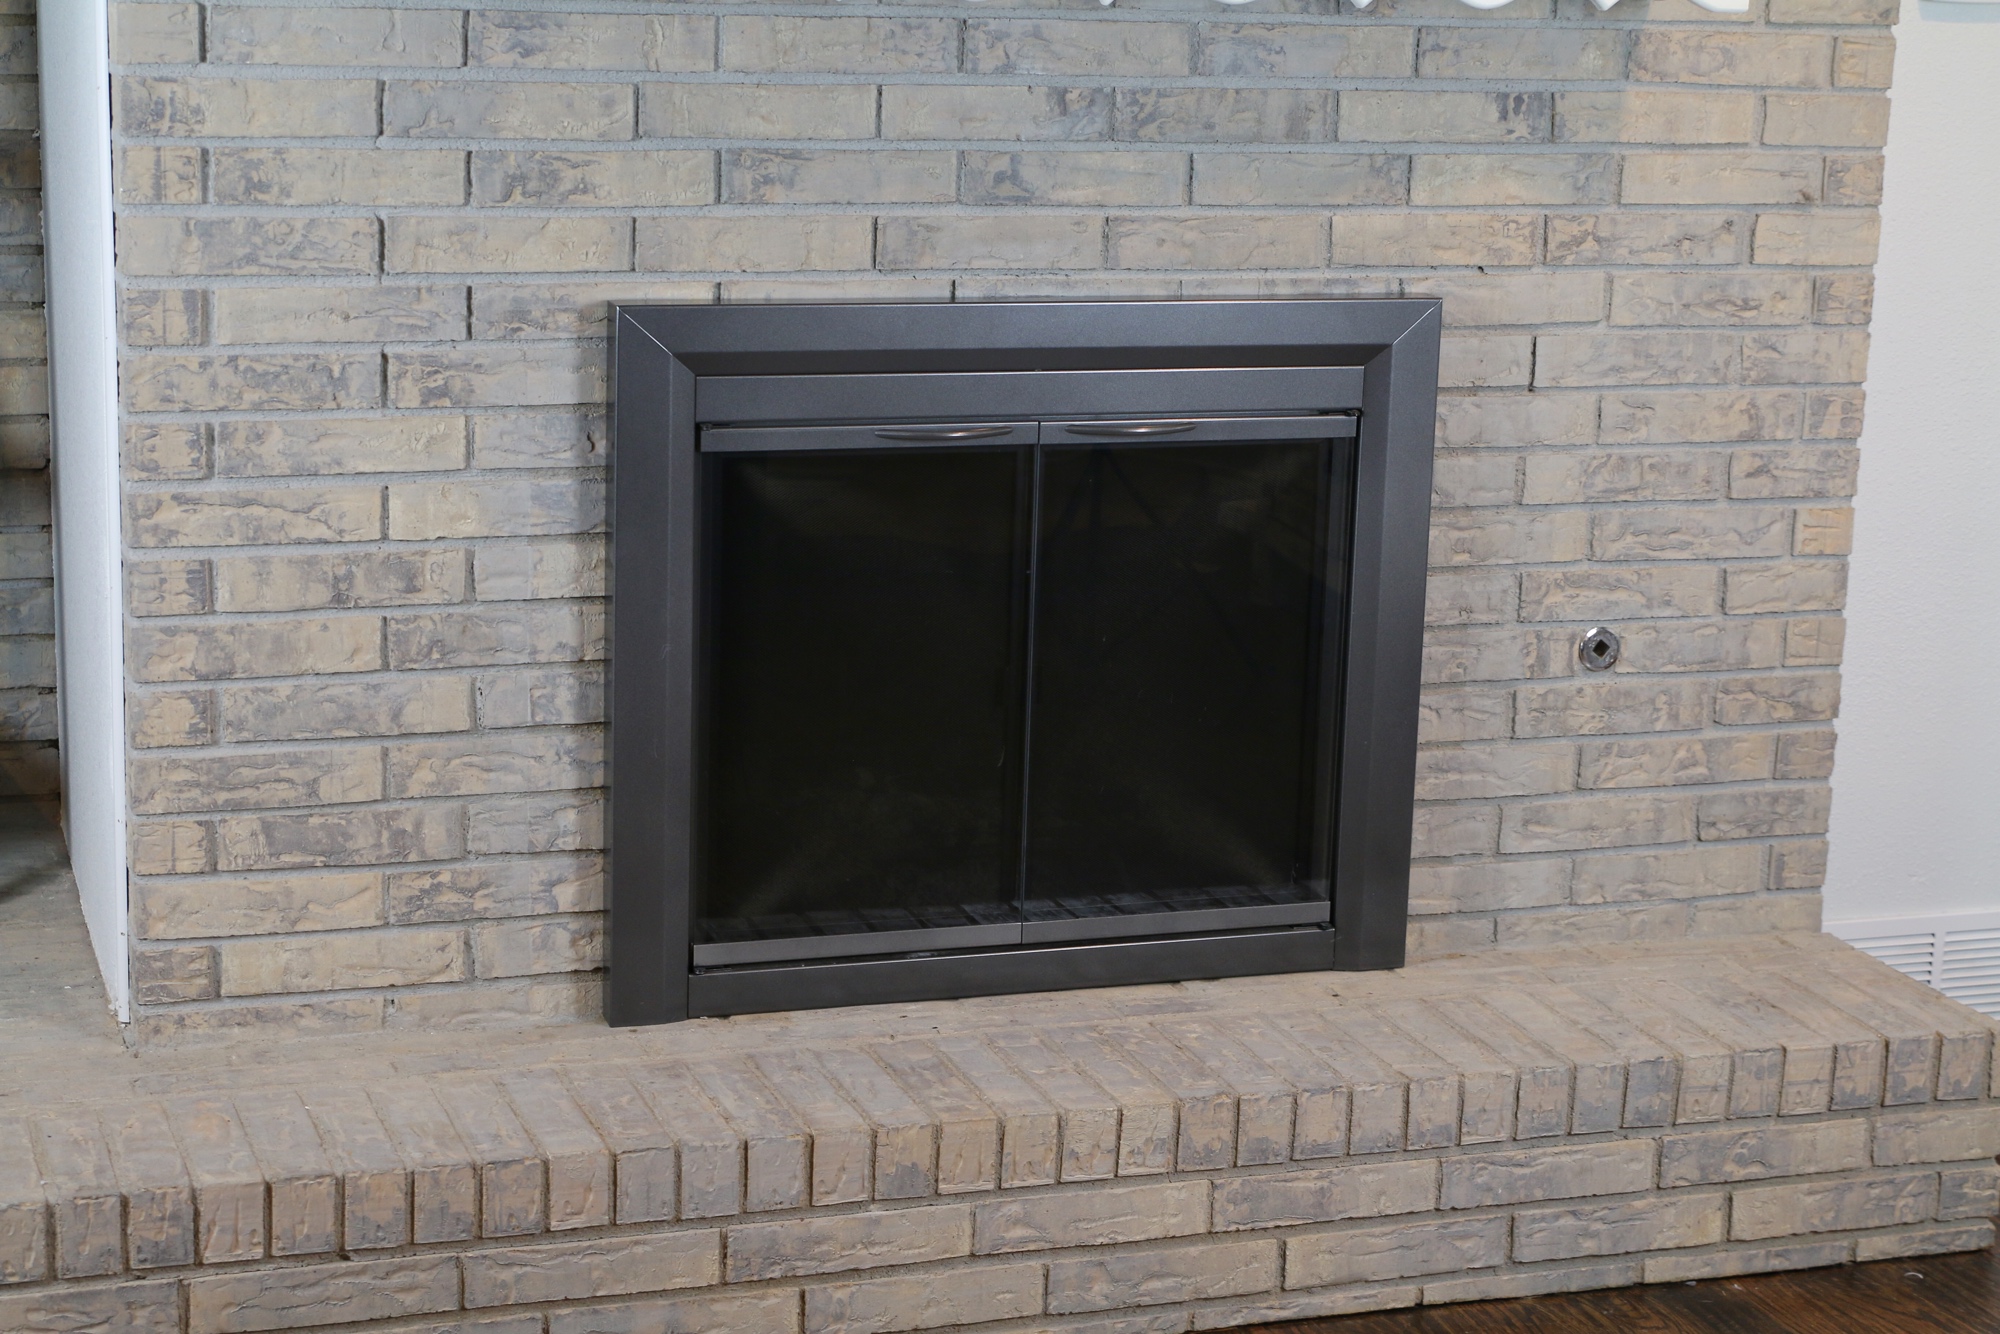
If you have a fireplace with insert, you’ll want to make sure your doors are closed and tape off your fireplace doors. You can even use a paint tarp to cover the glass to prevent getting paint on them. I purchased new doors so this didn’t apply to our project.
Depending on the size of your fireplace, you can start with 1/2 cup of paint and 1 1/2 cups of water. I mixed my paint and water in a small paint pail with a handle to easily dip my brush. I also kept an old rag handy for soaking up any drips from the watered down paint.
When you mix the water in your paint, you need to stir well. It will be very watery and you may think it doesn’t look like enough paint, but trust me it is. If you start your project and you want your bricks darker, you can add more paint to your mixture. I wanted to still see the natural brick design underneath the paint so I didn’t want it too thick.
You can use any size paint brush to whitewash your bricks. Dip your brush in your paint and water mixture, then go at it. It will be runny and there will be drips which is totally fine. You can just catch them with the brush as you move down the bricks. I suggest starting at the top and working your way down since it’ll run. The paint is so thin that there will not be drip marks so do not feel stressed or rushed to paint it evenly.
Supplies for Whitewashing Brick
- Paint in color of choice
- Water
- Paint Pail or old bucket
- Paint Brush
- Old Rag
Once I finished whitewashing our brick fireplace, I wanted the grout to blend a little more. I could still see the tan color coming through. So instead of using the watered down paint, I used a small paintbrush and dipped directly into the Sherwin-Williams paint sample. It may seem like a tedious task to hand paint all the grout but it was worth it. It went by quickly.
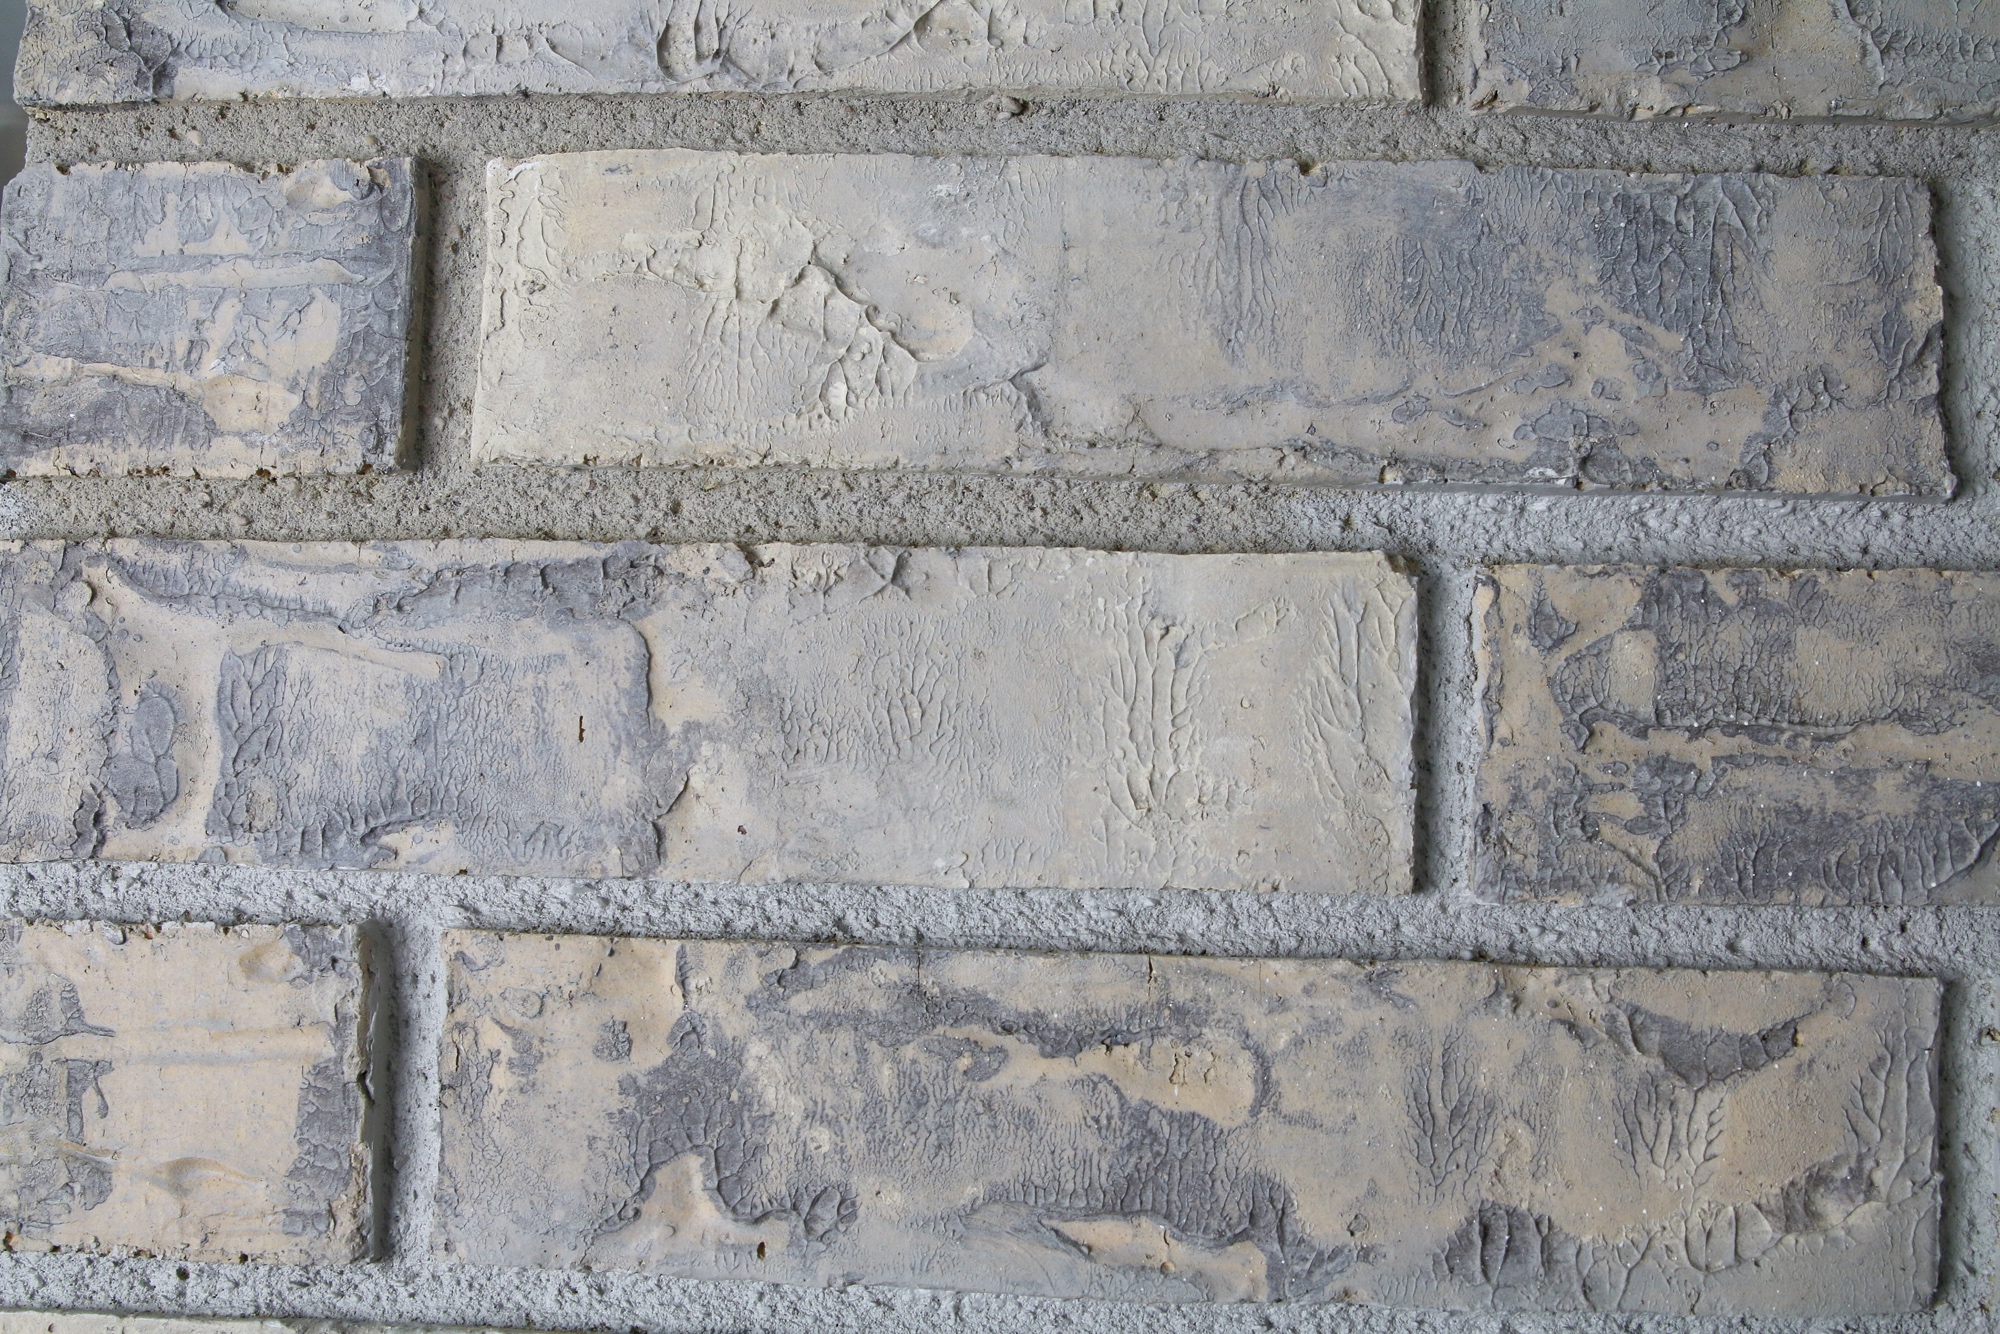
On this photo, you can see where some of the grout is painted gray and some weren’t finished. The difference is subtle but enough to be noticeable when looking at the full bricks.
I love the finished project and feel like it brought out the light gray paint color on our walls. It has really helped brighten up the living room and gave it a more modern farmhouse appeal instead of the dated brown look.

After whitewashing the bricks, I ordered new fireplace doors in gunmetal gray to replace the old doors with gold from the 70s. They were easy to install by simply sliding the old doors up and off the bricks.

What home improvement project are you working on?
Here are some of our in-process photos to show the progress and change:


Looking for more home projects? Check out this Dollar Tree Craft Farmhouse Pomander Ball.

Pin for Later:

This is great! I have brick much the same color and had been wondering what I could do to perk it up. It’s also got soot stains on the brick hearth and around the door. Assuming I wash that as best I can, do I need any kind of Kilz or primer, do you think? The silver/gray would be perfect, though since a lot of the trim in my living area is black.
Very nice, better than a thoughtless white whitewash. Just tones it down but remains warm with more of an interesting modern look,