How to Make a Cakepop Stand
Last Fall I discovered my love of baking cakepops. For Halloween the kids helped me with the sprinkles and decorating. Then for T’s Breaking Dawn party I baked red velvet with cream cheese icing cakepops for our candy bar, which turned out delicious. The kids enjoy helping me with the baking, although I know they are just in the kitchen waiting for their favorite part, to eat them…
For my niece’s Sweet 16 she asked me to bake her cakepops. The only thing she told me was that her favorite colors were metallic blue and black. In the past I wrapped each cakepop individually when handing them out but this time I wanted to display them on a stand in resemblance of a cake. All the cakepop stands I found at stores only held a few or weren’t very fancy. My good friend found an idea on Pinterest of using Styrofoam as a base and building your own. So, that’s what I did…
 How to Make a Cakepop Stand:
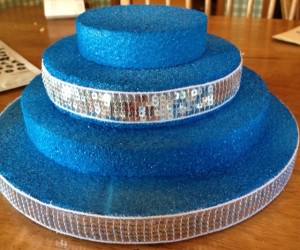
- Gather supplies. I decided to go with a four tier stand for my cakepops therefore I had to purchase four slightly different sizes of Styrofoam. You’ll also need a hot glue gun and glue sticks, spray paint of your choice and trim for around the Styrofoam to make it decorative.

- You’ll want to spray paint your Styrofoam outside so you don’t get paint on everything. Make sure you hold the paint can away from the Styrofoam when spraying the paint because it doesn’t take too much and it’ll be extremely wet. Spraying in small bursts works best. I added a light finishing coat of glitter to add some sparkle to the blue paint. That gave it the metallic look. I went with Diamond Dust color.

- After you have the Styrofoam painted and it dries, you’ll want to add the trim. I suggest adding trim to each layer before hot gluing the tiers together. This way it’s easier to maneuver in your hand. Measure your trim or ribbon around each layer and then cut before attempting to hot glue around. It’s much easier to work with the exact size of trim than trying to glue while it’s still attached to the spool. I used silver ribbon from the fabric section of Hobby Lobby for two layers and black tissue paper for the other layers. The tissue paper actually worked surprisingly well to offset the sparkle. I felt four layers of glittery ribbon was too much and gave it a disco look. The black dull tissue paper helped tone it down.


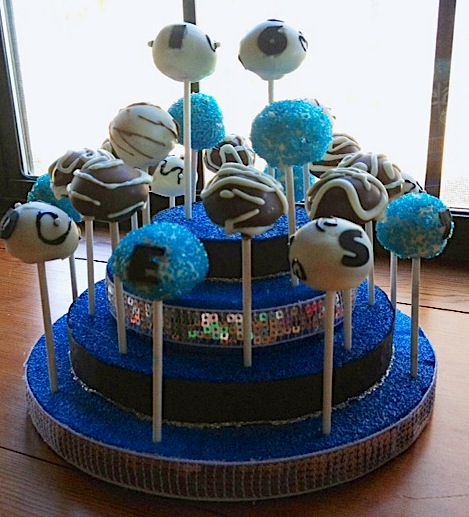
- Once you get all the trim set in place, you can start hot gluing each tier on top. Once all four tiers are glued together you can add finishing touches. I went in and added some silver glitter glue on two layers.
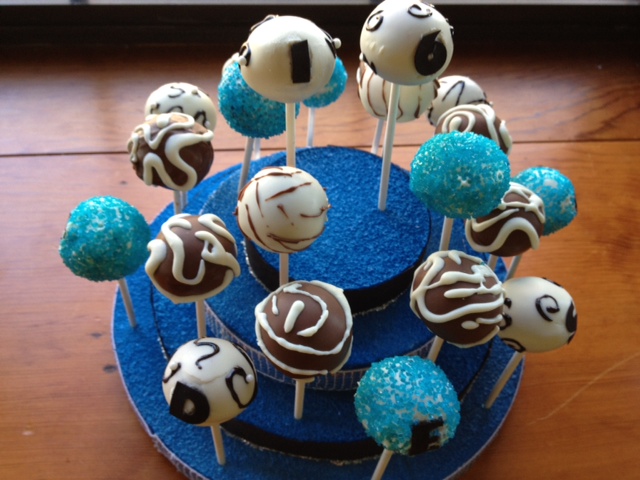
- Now your cakepop stand is ready to be filled. I suggest counting out how many cakepops you want to fit on the stand before pressing the sticks into the Styrofoam. Once you make a hole it’s not easy to hide. Push each cakepop stick down at least an inch and a half into the Styrofoam to make sure they don’t fall over. I suggest even further down if the tops are heavy. You can use sticks to pre-press holes before putting your cakepops on the stand. If you try pushing the actual cakepops into the stand without making holes in the Styrofoam first, you run the chance of knocking the cakepop off the stick. So be very careful.


That is so awesome, Dwan! I love the way it turned out!!
You are so crafty! I pinned you.
That’s really cute. I’ve been wanting to make cake pops, something my husband just doesn’t understand. One of these days, I’ll drive myself up the wall and give them a try.
This is such an awesome tutorial! I am sharing it with my crafty friends. This would be perfect at my son’s birthday party next month. If I get inspired enough to make cake pops for the first time LOL
What a clever idea!! I love that. I have not tried to make cake pops yet, but they look like such a great thing especially for school birthday parties. Thanks for the inspiration. Great to find you on Twitter. I’m now happily following!
Hi,
Did you buy your Styrofoam pre-cut? as I’m finding it very hard to cut.
Also what spray paint did you use as the one I’m using seems to be peeling off??
Regards
Candis
Candis: I did purchase the styrofoam pre-cut at Hobby Lobby. They have styrofoam in all shapes and sizes. I wasn’t brave enough to attempt the cutting myself. I also purchased my paint there and held the spray can a good ways away from the styrofoam and only sprayed a light coat, it never peeled for me.
love the idea! I’m trying to duplicate but having a hard time finding different sized circles. Do you recall what size and width these are? All I’m finding is 1″ thick which is too thin I think for these pops. Thx!
They are only about an inch think, which is why I stacked several on top of one another. I only pushed the cake pop stick in deep enough for it to stand up. Since it is styrofoam it is pretty stable and each circle is glued on top of the other so they aren’t falling off. I found all of them at Hobby Lobby but I believe Michael’s and even some Walmarts have them too.
One word… AWESOME! I found other ideas on the internet but yours was the simplest to make. I’ve been making pops for some time now and always use cellophane bags and ribbon but displaying the pops on one of these really shows off the detail on the pops. Thanks!!
Anna: I am so glad that you found my resource helpful. I’d love to see your cakepop stand if you want to share with me. If you are on Facebook head over to my page and upload an image for me to see http://fb.com/mommadjaneblog
This is awesome. I will definitely try this. I make cake pops all the time and have tried several different ways to display them. My question would be, is the stand heavy enough that it won’t wobble or lift when someone goes to pick one up?
Can you just use regular spray paint for this? Or do you have to use craft spray paint?
You can test out different spray paint to see what works best with styrofoam. Some paint may eat away at the styrofoam so I would use a light coat. Also remember to make sure the cake pops never touch the paint, as some paints are toxic.
Great idea but I found spray paint melts styrofoam so you need to get somthing from Ace hardware cuz hobby lobby didnt seem to know what kind to use. Also glue gun melted styrofoam also so make sure to use a tacky glue for styrofoam. My turned out beautiful. Always takes time to perfect.
I was browsing around Pinterest and found your tutorial and I love cakepops! and make them! and I found your tutorial helpful. I have a some questions. How many pops fit on the stand? How far apart do you have to space the pops in order to fit on the stand? Do I have to worry about the spray paint and food contamination? what’s the tissue paper for?
Happy I found this site!
GINA
Is that regular styrofoam or smooth styrofoam?